Collection: Solar panel camper: Everything about solar panels for your camper
Why a solar panel on my camper
It is of course not without reason that solar panels on your camper are becoming increasingly popular, because who wouldn't want to generate their own energy? With a solar panel set on your camper, you are not dependent on camper sites with fixed power connections. In addition, you are being green and you also save a nice amount of money that you can use to do other fun things. Difficult? I didn't think so, as long as you take a number of things into account, you can actually equip any camper with solar panels . We have already put together a number of systems for you, which makes it very easy. The 120 watt monocrystalline solar panel set is our best-selling set. In addition, we can put together a completely tailor-made system for you.

Is my camper suitable for solar panels?
Let's put it this way , all campers are suitable for solar panels . A camper has at least two batteries; one starter battery and one or more household batteries. The household battery is also called the accessory or the living battery. This battery is used to run all electronic equipment in your camper. Any type of battery that can be in your camper is suitable for charging with solar energy, whether it is a lithium, AGM, GEL or semi-traction battery, our PWM and MPPT charge controllers can charge these perfectly. For lithium batteries, settings may need to be changed, so always check with us. The idea is simple; If we ensure that this battery is always full, you can live comfortably from this battery. You can charge this battery in several ways, for example you can charge this battery via the alternator, in a factory camper this is set up this way as standard and this is controlled via the electronic control system. This same system also ensures that the battery is charged when you connect the camper to the fixed power pole. The third option is to charge this battery in your camper via a solar panel system. This is often not included as standard in the camper and only the newer campers have a solar panel preparation as a possible factory option. If we want to charge the battery in the camper with a solar panel, we will have to place a solar panel on the roof of the camper, where it is important that there is sufficient space on the roof and that the solar panel can be positioned free of shade. Because solar panels are connected in series inside, which means that the plus of one cell is connected to the minus of the next cell, a little shade already results in a significant reduction in power. So we want this to happen if possible. A 120 watt panel free of shade provides more energy during the day than a 175 watt panel that is (partially) shaded by, for example, the dish all day long. So take this into account when making your choice.
Camper solar panels: But what do I need?
Now that you know that your camper is suitable for solar panels and you know how much space you have available for solar panels, you naturally wonder what exactly you need? You may be pleased with the answer to this question. We have already discussed the most important component above; that is the solar panel. Yet there is more to say about this. For example, the two most commonly used types of solar panels are monocrystalline and polycrystalline solar panels. Simply put, the difference between the two is that monocrystallines are made from cells that consist of a single crystal. And polycrystalline panels consist of cells that consist of multiple crystals. The differences between these two types are relatively small. For example, poly panels are more sensitive to diffuse light (cloudy day), and mono panels are more sensitive to direct radiation. Because monocrystalline cells are more efficient, with more yield per cm2, the panels are generally smaller than the same watt peak polycrystalline panel. The yield of the two types is virtually the same. In other words, a 100 Watt peak polycrystalline panel produces approximately as much per year as a monocrystalline panel.
Camper solar panels: Cloudy, does the solar panel still supply power?
Certainly, the name solar panel suggests otherwise, but nothing could be further from the truth. There is no difference between solar panels and daylight panels, they are all made up of the same type of solar cells. Of course, there is a difference in quality in the cells themselves, which can result in a higher or lower yield, but it is not the case that there are cells that present better in daylight. Our solar panels are made of class A solar cells, which means that this guarantees the highest yield and longest lifespan in both full sun and daylight. The name solar panel comes from the process that takes place in the panel, namely the photovoltaic effect, which is nothing more than converting sunlight into energy. All light, including the light when it is cloudy, naturally comes from the sun. Naturally, less energy comes from the panels in cloudy weather and more energy in sunny weather.
Glass solar panels or flexible solar panels on my camper?
Flexible solar panels are very beautiful, super light and now last up to 10 years thanks to a top layer of ETFE. However, these panels also have disadvantages compared to glass panels. They are more expensive, heat up earlier, which reduces power, and despite a lifespan of up to 10 years, this is still less than the +25 years that glass solar panels last. That is why we recommend the following; If you have the option to install glass panels, this is preferable. If you are limited by weight and/or height or if you have a sloping surface, flexible panels are the perfect solution. In all other cases you are better off with a glass solar panel.

What power or how many watts peak (Wp) should the solar panel on my camper be?
How many peak watts should my solar panel be for the camper? This depends on three things: first, the goal you have in mind with the system. Is this extending the stay or going completely off-grid (i.e. being completely independent of a fixed connection). Secondly, what kind of equipment should work on this and how many hours per day. Thirdly, in what period of the year should this system operate? For example, the month of December produces only two percent of the annual yield because the days are short and with little solar power. If you have a gas refrigerator (absorption refrigerator), I can now reveal that it is not suitable for solar energy, because they simply use too much energy. Only compressor refrigerators are suitable for solar energy, they are up to a factor of 7 times as energy efficient as an absorption refrigerator. With a compressor refrigerator, the consumption per 24 hours is often given. If this is not the case, you can easily calculate this yourself. A compressor refrigerator is generally on 20% of the time. If you have a compressor refrigerator where the label states 65 watts, this means in practice that the refrigerator uses 65 * 20% = 13 watts per hour. To roughly calculate how many peak watts the solar panel should be, we create a table as below. Here we enter the wattage of the device and the number of hours per day that you use this device. To make it easy for you, we have already made an example calculation.

Table 1: calculation table consumption per day (24 hours).
Now that we know that we need approximately 380 watt hours per day, we can look in the table below to find which panel suits our consumption. In this example we assume the months April to September. A 120 watt peak panel has more than enough power in April with 432 watt hours, and in September with 360 watt hours it is only 20 watts less than required. In this case we can make some use of the existing battery. 20 watts is 1.5Ah per day, which we are short of. With a 100Ah battery we can still keep this going for a very long time.

Table 2: average yield per day in watt hours.
The charge controller of my camper solar panel is also not entirely unimportant
The second important component is the charge controller. The charge controller converts the voltage coming from the solar panel on your camper to the correct voltage to charge your battery. The charge controller does much more; charging in phases such as bulk, drip, equalization and it stops when your battery is full. The charge controller ensures that your battery lasts longer by charging it in exactly the way that your battery likes. Just like with solar panels, there are also two types of charge controllers. The PWM controller and the MPPT controller. The PWM controller is the simplest of the two but proven reliable. The PWM controller loads the solar panel until the voltage is equal to the battery and recharges the battery in this way. In addition, smart algorithms determine when which charging phase is required and thus keep your battery in top condition. The MPPT controller also has smart algorithms running at the solar panel input. These algorithms are continuously searching for the point at which the solar panel can supply the most power. This controller also owes its name MPPT, which is an abbreviation of Maximum Power Point Tracking, or this controller searches for the point at which the solar panel supplies the most power. A PWM controller starts charging immediately as soon as the voltage of the solar panel exceeds the voltage of the battery, MPPT controllers often require an excess of 5 volts with respect to the battery before they start up. For example, the battery is 13.2 volts when you wake up because you watched some TV and used lighting while it was dark and the solar panel was not charging. The solar panel must then provide 18.2 volts before the MPPT controller starts up. The PWM controller starts charging as soon as the voltage is greater than 13.2 volts. Depending on the circumstances, an MPPT controller removes 10-30% more energy from the panel. An MPPT controller is considerably more expensive than a PWM controller, so you must consider for each system what is the best option for you.

If you want a system with two solar panels on your camper, it is almost always better to use an MPPT controller. The solar panels on your camper can then be connected in series, this means that the plus of panel one is connected to the minus of panel two, which ensures that you can add the two voltages of the solar panels together, so you get even the least sunlight exceeds five volts and the MPPT controller begins to charge the battery. An exception to the above is if you have two panels, one of which is completely or partially in the shade. In this case it is better to connect the solar panels in parallel using Y split connectors. The panel in the shade will then have no negative effect on the panel in the sun.

Can I use any controller with any solar panel? No, the solar panel and the controller must be matched. Therefore, pay close attention to the maximum connected load of the controller. If in doubt, ask us and we will be happy to help you on your way. Almost all charge controllers have a simple LED indicator that indicates whether the system is working, whether the system is charging and also how full your battery is. If you do not have a proper indication in your camper, or if you just want to know everything, it is possible to connect a remote display or a Bluetooth module to the charge controller. You can then see on the display or in the accompanying app how much the solar panel is charging and how full your battery is. What you cannot see on this display is how much current is coming from your battery, as this goes directly from your battery and not via the charge controller. There is often another output on a charge controller, this output is referred to as load or with a lamp as a symbol. This output is connected to your battery and you can therefore draw power from it. The advantage of this output is that it serves as a battery protector, in other words this output is switched off when your battery is almost empty to prevent deep discharge. Please note that the output is often limited to the power of the controller itself. For example, a 10 amp controller can supply 10 amps via the output, which is equivalent to approximately 120 watts. If you overload the output, it will also switch off and cannot be switched on again until you disconnect this load.
In addition, a solar panel system on a camper also contains a power cable. This cable is between the solar panel and the charge controller and between the charge controller and the household battery. It is important that solar cable is used for this. This cable is UV-resistant and therefore suitable for outdoor use. An unsuitable cable crumbles over time. Every cable that carries current has a loss, this is called voltage drop across the cable. Roughly two factors determine how much that loss is, the first factor is the length of the cable. The advice is to keep this as short as possible and, where possible, to place the solar panel as close as possible above the battery on your camper so that the cable goes straight to can go downstairs. The second factor is the diameter of the cable, the thicker the cable, the less loss, on the other hand, the thicker the cable, the more expensive and the more difficult it is to bring it from the camper to the battery. We recommend using 4mm2 as a thickness, this is the perfect middle ground in terms of loss, price and processing. You can use a roof duct to insert the cable neatly and watertight into your camper. This is a small box that you glue to the roof of your camper with the same kit as the corner pieces. You can select this roof duct as an option for the complete sets. The Sikaflex kit already included is more than enough to also glue the roof duct.
The solar panel on the camper is mounted using mounting corner pieces. These are plastic parts made of Acrylonitrile Butadiene Styrene or ABS. ABS is a very strong plastic with a long lifespan and high resistance to chemicals, which makes it ideal for mounting solar panels on your camper. The solar panel is glued and/or screwed into the corner pieces and then glued to the roof with Sikaflex 252 kit designed for this application. It is not necessary to screw the solar panel to the camper, of course this is allowed, but the kit is more than strong enough to hold the solar panel under all circumstances. When determining the space for your solar panel, take into account the fact that the corner pieces protrude approximately 60 mm at the corners

Below is a list of required products if you want to put together a solar panel set for your camper yourself.
- Solar panel
- Charge controller
- Mounting corner pieces
- Cable
- Mounting kit
- Connector set
- Roof duct
- Remote display or Bluetooth module (optional)
We are ready to put together a system for you.
And then comes the installation of the solar panel on the camper...
At first, installing a solar panel on the camper yourself can seem like a challenge. Finally, you have to intervene in the existing electrical system, drill a hole in the roof to get the cables to the battery and then we have to think carefully about how we can neatly hide the cable. Yet this job is easier than you might think, and requires little technical knowledge, but above all requires two right hands and some time. The entire installation consists of just a few steps. The first step is to glue the solar panel to the roof. The second step is to drill a hole above one of the cabinets to insert the cable. Where possible, do this above the location of your battery so that the cable can go straight down. As a third step, mount the charge controller near your battery and connect the plus and minus of the controller to the plus and minus of your battery. As a fourth step, we connect the cable coming from the solar panel to the controller and at this point the system is fully operational. Enjoy it immediately? Yes, but the kit (the panel and the roof duct) must dry for at least 24 before you can safely hit the road. We have an extensive manual for the installation of solar panels on your camper that you can print or view on your tablet or phone. You can't go wrong with this manual download installation manual . Or watch the instruction video below.
Solar panel camper: Just that little bit extra.
Now we have done everything we can to get as much energy as possible from the solar panel on the camper , but did you know that you can also make a big difference with simple energy-saving adjustments? Although at first glance a 20-watt halogen light does not seem like much, it does add up, especially when you have three or four that are all on for a few hours a day. An LED version of this same light uses only two watts. If you consider that a modern 51cm LED TV consumes 18 watts when it is on, this is exactly the saving you will achieve by replacing one halogen lamp with an LED lamp. This is worth it, right? The second tip is obvious but often overlooked, really turn off unused equipment, as these devices often still use power. A good example of this is a TV receiver which still has a considerable power consumption in standby. Now you can start enjoying, the solar panel system on your camper is virtually maintenance-free. Because the solar panel is mounted flat on the roof of your camper, dirt can accumulate on the panel and this dirt has a negative impact on the yield, as less sun reaches the cells. You can easily solve this by rinsing the dirt from the solar panel with some water and then cleaning it further with a soft cloth.
Solar panels camper: Self-build camper
Are you building a camper yourself and do you still have to completely install the electrical system? We have a lot of experience with this and can help with this, including the solar panel on the camper, the battery, the battery charger, charging your household battery via the dynamo, 220 volt supply and more. Given the complexity, this requires consultation and involves custom work. Are you interested in this? Please contact us so that we can put together a complete system tailor-made for you.
-
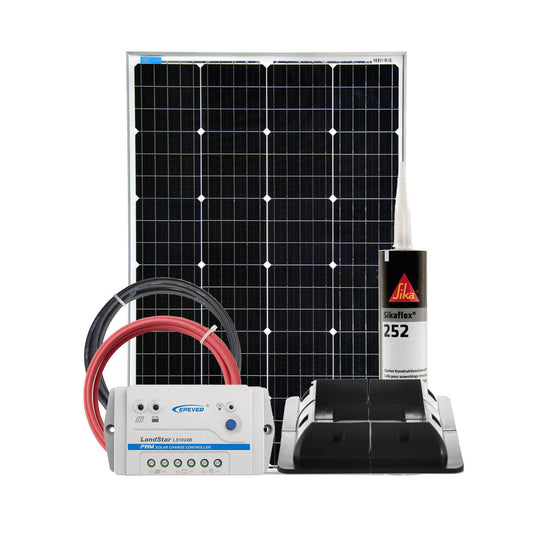
Solar panel set 120W 12V monocrystalline
33 reviewsSaleSolar panel set 120W 12V monocrystalline
33 reviewsRegular price From €259,00Regular priceUnit price / per€279,00Sale price From €259,00Sale -
 Sale
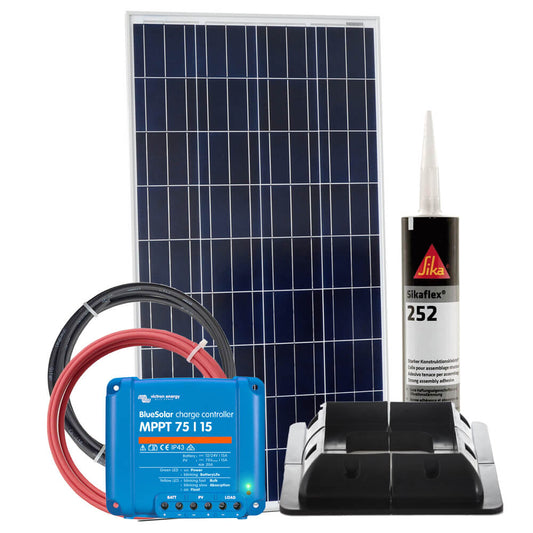
SaleSolar panel set 185W 12V Monocrystalline - Victron Energy
29 reviewsRegular price From €299,00Regular priceUnit price / per€449,00Sale price From €299,00Sale -
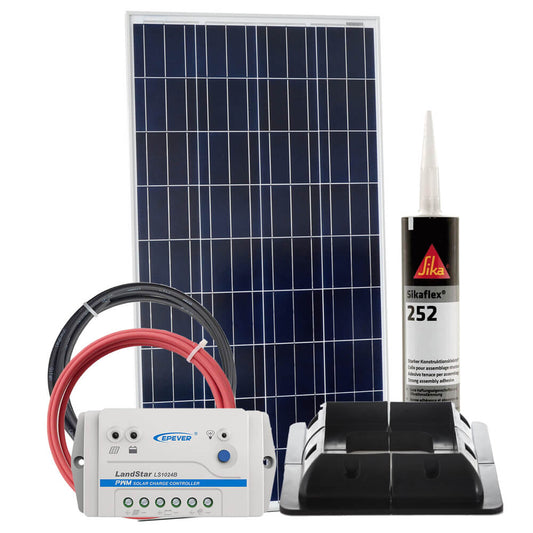
Solar panel set 100W 12V polycrystalline
33 reviewsSolar panel set 100W 12V polycrystalline
33 reviewsRegular price From €239,00Regular priceUnit price / per -
 Sale
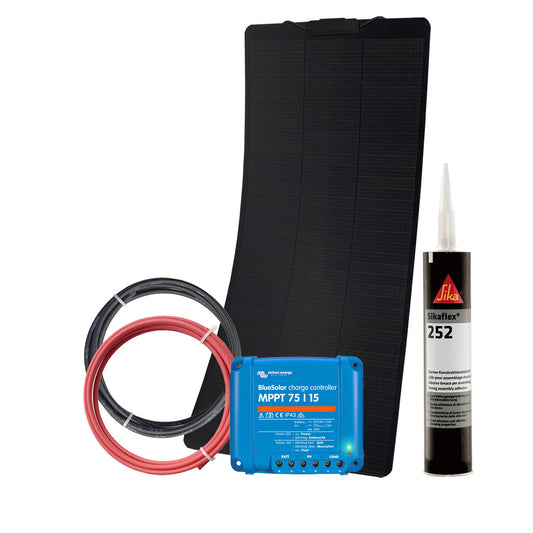
SaleSolar panel set flexible 100 Watt shingled - ETFE
4 reviewsRegular price €329,95Regular priceUnit price / per€399,95Sale price €329,95Sale -
 Sale
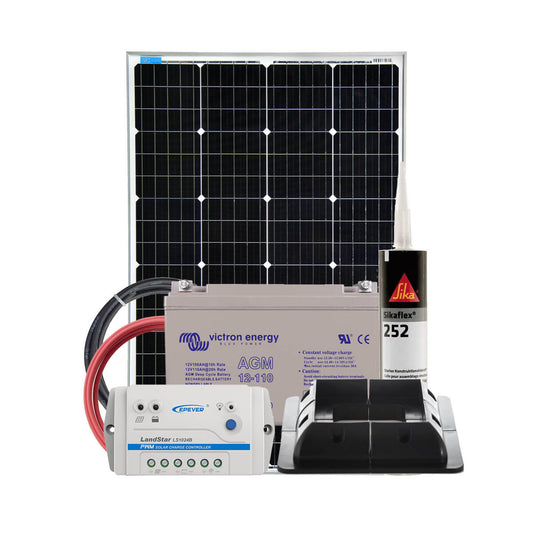
SaleSolar panel set 120W 12V monocrystalline with 110Ah AGM battery
33 reviewsRegular price From €589,00Regular priceUnit price / per€678,00Sale price From €589,00Sale -
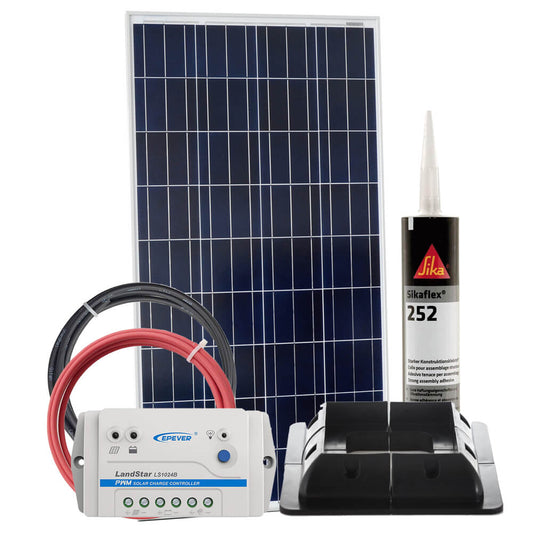
Solar panel set 80 Watt peak 12V
33 reviewsSolar panel set 80 Watt peak 12V
33 reviewsRegular price From €209,00Regular priceUnit price / per -
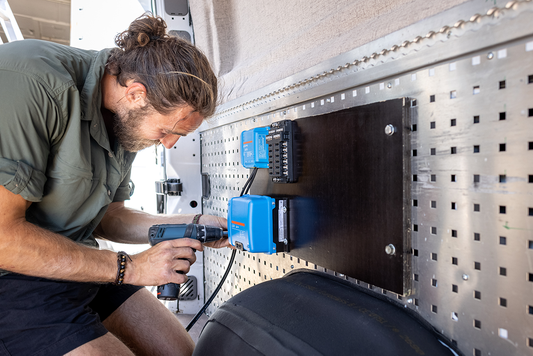
Self-build camper electrical parts package
11 reviewsSelf-build camper electrical parts package
11 reviewsRegular price From €2.099,00Regular priceUnit price / per -
Solar panel set 120W 12V flexible lifting roof camper
9 reviewsRegular price From €379,00Regular priceUnit price / per -
Solar panel set 175W 12V Monocrystalline - Victron Energy
2 reviewsRegular price From €499,00Regular priceUnit price / per€449,00Sale price From €499,00 -
Solar panel set 120W 12V monocrystalline MPPT
33 reviewsRegular price From €339,00Regular priceUnit price / per -
Compressor cool box 12 Volt 35 liters with freezer compartment
No reviewsRegular price €439,00Regular priceUnit price / per


